LinuCエヴァンジェリストの鯨井貴博@opensourcetechです。
はじめに
今回は、こちらの記事で作成したkubernetesクラスター v1.26.00で、
nginxコンテナ(Pod)のコンテンツファイル(index.html)をConfigMapを使って提供、またコンテンツファイルの更新をやってみます。
実施する内容
以下のように進めていきます。
①コンテンツファイル index.html(ConfigMap)の作成
※Deploymentで指定する
②nginxコンテナ(Deployment)のデプロイ
③コンテナの公開(Service)
④クライアントからのアクセス
⑤コンテンツファイルの更新
①コンテンツファイル index.html(ConfigMap)の作成
まず、HTML/CSSでindex.htmlを作成します。
kubeuser@master01:~/configmap$ ls
current

kubeuser@master01:~/configmap$ ls current/
index.html

kubeuser@master01:~/configmap$ cat ./current/index.html
<!DOCTYPE html>
<html>
<head>
 <title>Welcome to nginx!</title>
 <style>
  html { color-scheme: dark; }
  body { width: 35em; margin: 0 auto;
  font-family: Tahoma, Verdana, Arial, sans-serif; }
 </style>
</head>
<body>
 <h1>Welcome to nginx!</h1>
 <p>If you see this page, the nginx web server is successfully installed and working. Further configuration is required.</p>

 <p>For online documentation and support please refer to
 <a href="http://nginx.org/">nginx.org</a>.<br/>
 Commercial support is available at
 <a href="http://nginx.com/">nginx.com</a>.</p>

 <p><em>Thank you for using nginx.</em></p>
</body>
</html>
作成したindex.htmlを元に、ConfigMapを作成します。
kubeuser@master01:~/configmap$ kubectl create configmap index-dark --from-file ./current/index.html --dry-run=client -o yaml > configmap_dark.yaml

kubeuser@master01:~/configmap$ ls
configmap_dark.yaml  current

kubeuser@master01:~/configmap$ cat configmap_dark.yaml
apiVersion: v1
data:
  index.html: |
    <!DOCTYPE html>
    <html>
    <head>
     <title>Welcome to nginx!</title>
     <style>
      html { color-scheme: dark; }
      body { width: 35em; margin: 0 auto;
      font-family: Tahoma, Verdana, Arial, sans-serif; }
     </style>
    </head>
    <body>
     <h1>Welcome to nginx!</h1>
     <p>If you see this page, the nginx web server is successfully installed and working. Further configuration is required.</p>

     <p>For online documentation and support please refer to
     <a href="http://nginx.org/">nginx.org</a>.<br/>
     Commercial support is available at
     <a href="http://nginx.com/">nginx.com</a>.</p>

     <p><em>Thank you for using nginx.</em></p>
    </body>
    </html>
kind: ConfigMap
metadata:
  creationTimestamp: null
  name: index-dark

kubeuser@master01:~/configmap$ kubectl apply -f configmap_dark.yaml
configmap/index-dark created

kubeuser@master01:~/configmap$ kubectl get cm
NAME               DATA   AGE
index-dark         1      4s
kube-root-ca.crt   1      4d19h
②nginxコンテナ(Deployment)のデプロイ
続いて、作成したConfigMapを読み込むDeploymentを作成して、
nginxコンテナをデプロイします。
※replicas 1、nginxのバージョンは1.23.0としました。
まずDeploymentのyamlを作成。
kubeuser@master01:~/configmap$ vi deployment.yaml

kubeuser@master01:~/configmap$ cat deployment.yaml
apiVersion: apps/v1
kind: Deployment
metadata:
  labels:
    app: nginx
  name: nginx
spec:
  replicas: 1
  selector:
    matchLabels:
      app: nginx
  strategy: {}
  template:
    metadata:
      labels:
        app: nginx
    spec:
      containers:
      - image: nginx:1.23.0
        name: nginx
        volumeMounts:
        - name: index-volume
          mountPath: /usr/share/nginx/html
      volumes:
      - name: index-volume
        configMap:
          name: index-dark
作成したyamlをデプロイします。
kubeuser@master01:~/configmap$ kubectl apply -f deployment.yaml
deployment.apps/nginx created

kubeuser@master01:~/configmap$ kubectl get all
NAME                         READY   STATUS    RESTARTS   AGE
pod/nginx-59d7dcfd48-zl9zk   1/1     Running   0          23s

NAME                 TYPE        CLUSTER-IP   EXTERNAL-IP   PORT(S)   AGE
service/kubernetes   ClusterIP   10.1.0.1     <none>        443/TCP   4d19h

NAME                    READY   UP-TO-DATE   AVAILABLE   AGE
deployment.apps/nginx   1/1     1            1           23s

NAME                               DESIRED   CURRENT   READY   AGE
replicaset.apps/nginx-59d7dcfd48   1         1         1       23s
③コンテナの公開(Service)
Serviceのyamlを作成します。
※type:LoadBalancerとしています。
※type:LoadBalancerに関しては、こちらを参照ください。
kubeuser@master01:~/configmap$ kubectl expose deployment nginx --port=80 --type=LoadBalancer --dry-run=client -o yaml > svc.yaml

kubeuser@master01:~/configmap$ cat svc.yaml
apiVersion: v1
kind: Service
metadata:
  creationTimestamp: null
  labels:
    app: nginx
  name: nginx
spec:
  ports:
  - port: 80
    protocol: TCP
    targetPort: 80
  selector:
    app: nginx
  type: LoadBalancer
status:
  loadBalancer: {}
yamlをデプロイします。
kubeuser@master01:~/configmap$ kubectl apply -f svc.yaml
service/nginx created

kubeuser@master01:~/configmap$ kubectl get svc
NAME         TYPE           CLUSTER-IP    EXTERNAL-IP    PORT(S)        AGE
kubernetes   ClusterIP      10.1.0.1      <none>         443/TCP        4d19h
nginx        LoadBalancer   10.1.231.71   192.168.1.51   80:30066/TCP   5s
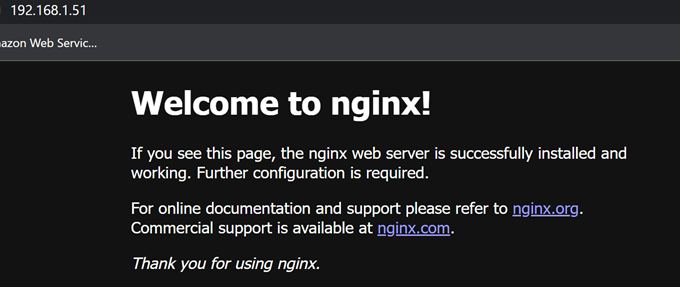
④クライアントからのアクセス
クライアント(ブラウザ)からアクセスできました!
⑤コンテンツファイルの更新
次は、HPの更新などを想定した操作(index.htmlの入れ替え)をやってみます。
基本的には①と同じ手順で新しいコンテンツファイルを作成して、
②のDeployment用のyamlを編集してデプロイすればOKです。
"new"というディレクトリを更新用に使いました。
kubeuser@master01:~/configmap$ ls -R
.:
current  new

./current:
index.html

./new:
index.html

kubeuser@master01:~/configmap$ cat ./new/index.html
<!DOCTYPE html>
<html>
<head>
 <title>Welcome to nginx!</title>
 <style>
  html { color-scheme: light; }
  body { width: 35em; margin: 0 auto;
  font-family: Tahoma, Verdana, Arial, sans-serif; }
 </style>
</head>
<body>
 <h1>Welcome to nginx!</h1>
 <p>If you see this page, the nginx web server is successfully installed and working. Further configuration is required.</p>

 <p>For online documentation and support please refer to
 <a href="http://nginx.org/">nginx.org</a>.<br/>
 Commercial support is available at
 <a href="http://nginx.com/">nginx.com</a>.</p>

 <p><em>Thank you for using nginx.</em></p>
</body>
</html>
ConfigMapの作成からデプロイ。
kubeuser@master01:~/configmap$ kubectl create configmap index-light --from-file ./new/index.html --dry-run=client -o yaml > configmap_light.yaml

kubeuser@master01:~/configmap$ ls
configmap_dark.yaml  configmap_light.yaml  current  deployment.yaml  new  svc.yaml

kubeuser@master01:~/configmap$ kubectl apply -f configmap_light.yaml
configmap/index-light created

kubeuser@master01:~/configmap$ kubectl get cm
NAME               DATA   AGE
index-dark         1      17m
index-light        1      4s
kube-root-ca.crt   1      4d19h
Deploymentのyaml(ConfigMapの箇所)を更新します。
kubeuser@master01:~/configmap$ vi deployment.yaml

kubeuser@master01:~/configmap$ cat deployment.yaml
apiVersion: apps/v1
kind: Deployment
metadata:
  labels:
    app: nginx
  name: nginx
spec:
  replicas: 1
  selector:
    matchLabels:
      app: nginx
  strategy: {}
  template:
    metadata:
      labels:
        app: nginx
    spec:
      containers:
      - image: nginx:1.23.0
        name: nginx
        volumeMounts:
        - name: index-volume
          mountPath: /usr/share/nginx/html
      volumes:
      - name: index-volume
        configMap:
          #name: index-dark
          name: index-light
yamlをデプロイすると、既存のDeploymentが更新(Podの削除→再作成)されます。
kubeuser@master01:~/configmap$ kubectl apply -f deployment.yaml
kudeployment.apps/nginx configured

kubeuser@master01:~/configmap$ kubectl get pod -w
NAME                     READY   STATUS        RESTARTS   AGE
nginx-59d7dcfd48-zl9zk   1/1     Terminating   0          87m
nginx-7fffd76c68-phbbm   1/1     Running       0          3s
nginx-59d7dcfd48-zl9zk   1/1     Terminating   0          87m
nginx-59d7dcfd48-zl9zk   0/1     Terminating   0          87m
nginx-59d7dcfd48-zl9zk   0/1     Terminating   0          87m
nginx-59d7dcfd48-zl9zk   0/1     Terminating   0          87m

kubeuser@master01:~/configmap$ kubectl get pod
NAME                     READY   STATUS    RESTARTS   AGE
nginx-7fffd76c68-phbbm   1/1     Running   0          12s
クライアント(ブラウザ)からアクセス(F5などをクリックして再読み込み)すると、
更新されたコンテンツが表示されます。

おわりに
今回やってみて、改めてkubernetesは様々なものをリソース(Deployment・ConfigMapなど)で定義するんだなぁと感じました。
仮想マシン(VM)などでWebサーバを作る場合は
OS・Webサーバソフトウェア・コンテンツが一体(密結合)となっていますが、
kubernetesの場合、Deployment(Pod)がWebサーバソフトウェア、
ConfigMapがコンテンツとそれぞれ独立(疎結合)になっています。
コンテンツファイルを更新する作業自体はどちらも似たような感覚を持ちましたが、実施している内容(挙動)は異なることを意識する必要がありますね。
なお、通常はDeployment配下のPodを冗長(Replicasを2以上)にするかと思うので、
仮想マシンのように全台で更新作業をしなくていいのはkubernetesが疎結合であるメリットですね!