こんにちは、鯨井貴博@opensourcetechです。
今回は、Raspberry Pi zeroにUSB OTG(On-The-Go)で接続する方法を試してみます。
※ zeroに、HDMIさしてモニターにつないだり、USBキーボードやマウス・wi-fiドングルを刺して設定したくない方には最適です。
USB OTGとは?
USBは元々、PCと周辺機器を接続するための規格ですが、
それを拡張して周辺機器同士を接続させてしまおうという仕様です。
詳細は、以下などをご覧ください。
USB OTG(USB On-The-Go)でAndroidを活用 - サンワサプライ株式会社
物理的な構成
USB OTGを使用すると、PCのUSBポート と Raspberry Pi zeroを直結するだけで
電源共有と併せて169.254.0.0/16のネットワークで接続され、sshが可能になるなどの恩恵を受けることが出来ます。
※今回は、PCとしてMac bookを使用。

Rasbianのセットアップ
①Rasbianをダウンロード
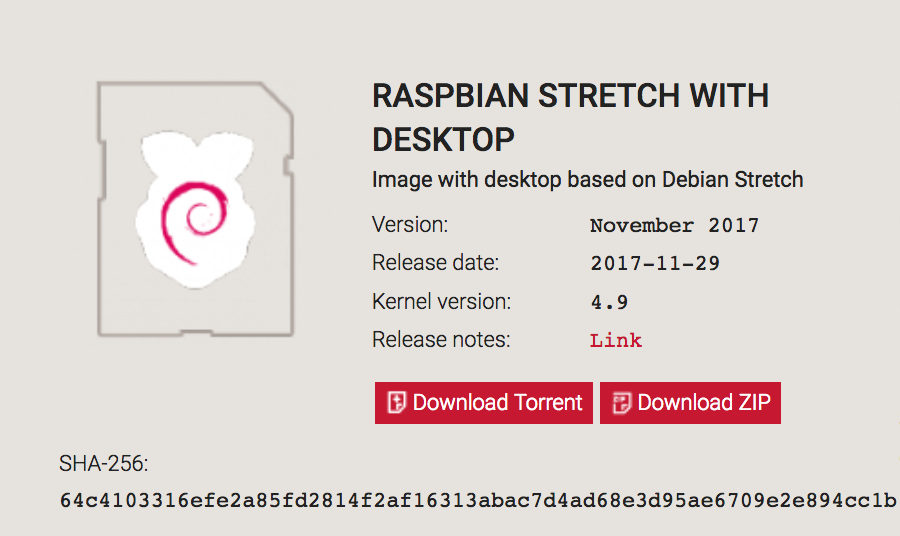
以下からRasbian Stretch with Desktopを入手します。

②ダウンロードしたファイルを解凍。
unzipなどで解凍してください。
③SDカードへRasbianをコピー
PCへSDカードを挿入します。
自動的にマウントされると思いますので、一度アンマウントします。
hyfr:~ hyperfree$ mount
/dev/disk1 on / (hfs, local, journaled)
devfs on /dev (devfs, local, nobrowse)
map -hosts on /net (autofs, nosuid, automounted, nobrowse)
map auto_home on /home (autofs, automounted, nobrowse)
/dev/disk2s1 on /Volumes/boot (msdos, local, nodev, nosuid, noowners)
hyfr:~ hyperfree$
hyfr:~ hyperfree$ sudo umount /dev/disk2s1
Password:
hyfr:~ hyperfree$ mount
/dev/disk1 on / (hfs, local, journaled)
devfs on /dev (devfs, local, nobrowse)
map -hosts on /net (autofs, nosuid, automounted, nobrowse)
map auto_home on /home (autofs, automounted, nobrowse)
アンマウント後、ddでRasbianをコピーします。
※結構時間がかかるので、食事したり風呂入ったりしながら気長に待ちます。私の場合、1時間半くらいかかりましたw
hyfr:Downloads hyperfree$ sudo dd bs=1m if=/Users/hyperfree/Downloads/2017-11-29-raspbian-stretch.img of=/dev/disk2
Password:
4692+0 records in
4692+0 records out
4919918592 bytes transferred in 4184.628579 secs (1175712 bytes/sec)
hyfr:Downloads hyperfree$ mount
/dev/disk1 on / (hfs, local, journaled)
devfs on /dev (devfs, local, nobrowse)
map -hosts on /net (autofs, nosuid, automounted, nobrowse)
map auto_home on /home (autofs, automounted, nobrowse)
/dev/disk2s1 on /Volumes/boot (msdos, local, nodev, nosuid, noowners)
④ファイルsshの作成
Raspberry Pi zeroにssh出来るようにするため、sshという空ファイルを作成します。
hyfr:Downloads hyperfree$ cd /Volumes/boot/
hyfr:boot hyperfree$ ls
COPYING.linux bcm2710-rpi-cm3.dtb kernel.img
LICENCE.broadcom bootcode.bin kernel7.img
LICENSE.oracle cmdline.txt overlays
bcm2708-rpi-0-w.dtb config.txt start.elf
bcm2708-rpi-b-plus.dtb fixup.dat start_cd.elf
bcm2708-rpi-b.dtb fixup_cd.dat start_db.elf
bcm2708-rpi-cm.dtb fixup_db.dat start_x.elf
bcm2709-rpi-2-b.dtb fixup_x.dat
bcm2710-rpi-3-b.dtb issue.txt
hyfr:boot hyperfree$ touch ssh
hyfr:boot hyperfree$ ls
COPYING.linux bcm2710-rpi-cm3.dtb kernel.img
LICENCE.broadcom bootcode.bin kernel7.img
LICENSE.oracle cmdline.txt overlays
bcm2708-rpi-0-w.dtb config.txt ssh
bcm2708-rpi-b-plus.dtb fixup.dat start.elf
bcm2708-rpi-b.dtb fixup_cd.dat start_cd.elf
bcm2708-rpi-cm.dtb fixup_db.dat start_db.elf
bcm2709-rpi-2-b.dtb fixup_x.dat start_x.elf
bcm2710-rpi-3-b.dtb issue.txt
⑤cmdline.txtの編集
「modules-load=dwc2,g_ether」を追加します。
※追加場所は、以下にあるように rootwait と quiet の間。
hyfr:boot hyperfree$ cat cmdline.txt
dwc_otg.lpm_enable=0 console=serial0,115200 console=tty1 root=PARTUUID=49783f5b-02 rootfstype=ext4 elevator=deadline fsck.repair=yes rootwait quiet init=/usr/lib/raspi-config/init_resize.sh splash plymouth.ignore-serial-consoles
hyfr:boot hyperfree$ vi cmdline.txt
hyfr:boot hyperfree$ cat cmdline.txt
dwc_otg.lpm_enable=0 console=serial0,115200 console=tty1 root=PARTUUID=49783f5b-02 rootfstype=ext4 elevator=deadline fsck.repair=yes rootwait modules-load=dwc2,g_ether quiet init=/usr/lib/raspi-config/init_resize.sh splash plymouth.ignore-serial-consoles
⑥config.txtの編集
ファイルの最後に、「dtoverlay=dwc2」を追加します。
hyfr:boot hyperfree$ cat config.txt
# For more options and information see
# http://rpf.io/configtxt
# Some settings may impact device functionality. See link above for details
# uncomment if you get no picture on HDMI for a default "safe" mode
#hdmi_safe=1
# uncomment this if your display has a black border of unused pixels visible
# and your display can output without overscan
#disable_overscan=1
# uncomment the following to adjust overscan. Use positive numbers if console
# goes off screen, and negative if there is too much border
#overscan_left=16
#overscan_right=16
#overscan_top=16
#overscan_bottom=16
# uncomment to force a console size. By default it will be display's size minus
# overscan.
#framebuffer_width=1280
#framebuffer_height=720
# uncomment if hdmi display is not detected and composite is being output
#hdmi_force_hotplug=1
# uncomment to force a specific HDMI mode (this will force VGA)
#hdmi_group=1
#hdmi_mode=1
# uncomment to force a HDMI mode rather than DVI. This can make audio work in
# DMT (computer monitor) modes
#hdmi_drive=2
# uncomment to increase signal to HDMI, if you have interference, blanking, or
# no display
#config_hdmi_boost=4
# uncomment for composite PAL
#sdtv_mode=2
#uncomment to overclock the arm. 700 MHz is the default.
#arm_freq=800
# Uncomment some or all of these to enable the optional hardware interfaces
#dtparam=i2c_arm=on
#dtparam=i2s=on
#dtparam=spi=on
# Uncomment this to enable the lirc-rpi module
#dtoverlay=lirc-rpi
# Additional overlays and parameters are documented /boot/overlays/README
# Enable audio (loads snd_bcm2835)
dtparam=audio=on
hyfr:boot hyperfree$ vi config.txt
hyfr:boot hyperfree$ cat config.txt
# For more options and information see
# http://rpf.io/configtxt
# Some settings may impact device functionality. See link above for details
# uncomment if you get no picture on HDMI for a default "safe" mode
#hdmi_safe=1
# uncomment this if your display has a black border of unused pixels visible
# and your display can output without overscan
#disable_overscan=1
# uncomment the following to adjust overscan. Use positive numbers if console
# goes off screen, and negative if there is too much border
#overscan_left=16
#overscan_right=16
#overscan_top=16
#overscan_bottom=16
# uncomment to force a console size. By default it will be display's size minus
# overscan.
#framebuffer_width=1280
#framebuffer_height=720
# uncomment if hdmi display is not detected and composite is being output
#hdmi_force_hotplug=1
# uncomment to force a specific HDMI mode (this will force VGA)
#hdmi_group=1
#hdmi_mode=1
# uncomment to force a HDMI mode rather than DVI. This can make audio work in
# DMT (computer monitor) modes
#hdmi_drive=2
# uncomment to increase signal to HDMI, if you have interference, blanking, or
# no display
#config_hdmi_boost=4
# uncomment for composite PAL
#sdtv_mode=2
#uncomment to overclock the arm. 700 MHz is the default.
#arm_freq=800
# Uncomment some or all of these to enable the optional hardware interfaces
#dtparam=i2c_arm=on
#dtparam=i2s=on
#dtparam=spi=on
# Uncomment this to enable the lirc-rpi module
#dtoverlay=lirc-rpi
# Additional overlays and parameters are documented /boot/overlays/README
# Enable audio (loads snd_bcm2835)
dtparam=audio=on
dtoverlay=dwc2
SDカードをPCから外し、Raspberry Pi zeroに挿入
①SDカードをアンマウント
hyfr:~ hyperfree$ mount
/dev/disk1 on / (hfs, local, journaled)
devfs on /dev (devfs, local, nobrowse)
map -hosts on /net (autofs, nosuid, automounted, nobrowse)
map auto_home on /home (autofs, automounted, nobrowse)
/dev/disk2s1 on /Volumes/boot (msdos, local, nodev, nosuid, noowners)
hyfr:~ hyperfree$ sudo umount /dev/disk2s1
hyfr:~ hyperfree$ mount
/dev/disk1 on / (hfs, local, journaled)
devfs on /dev (devfs, local, nobrowse)
map -hosts on /net (autofs, nosuid, automounted, nobrowse)
map auto_home on /home (autofs, automounted, nobrowse)
②SDカードをPCから外す
③Raspberry Pi zeroに挿入

PCとRaspberry Pi zeroをUSB接続
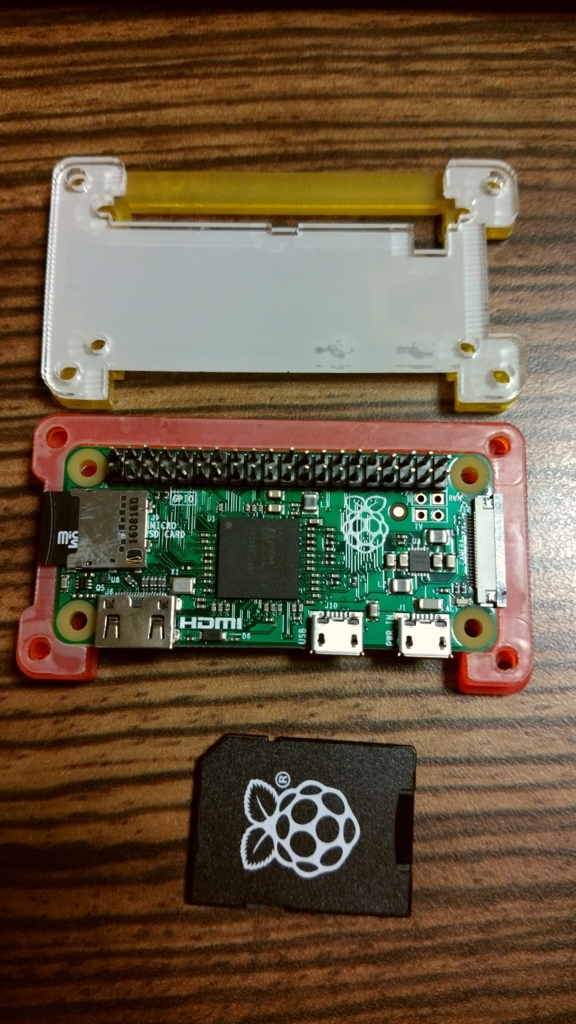
USBポートが2つありますが、以下のように真ん中寄りの方を使用します。
起動完了するまで、しばらく待ちます。

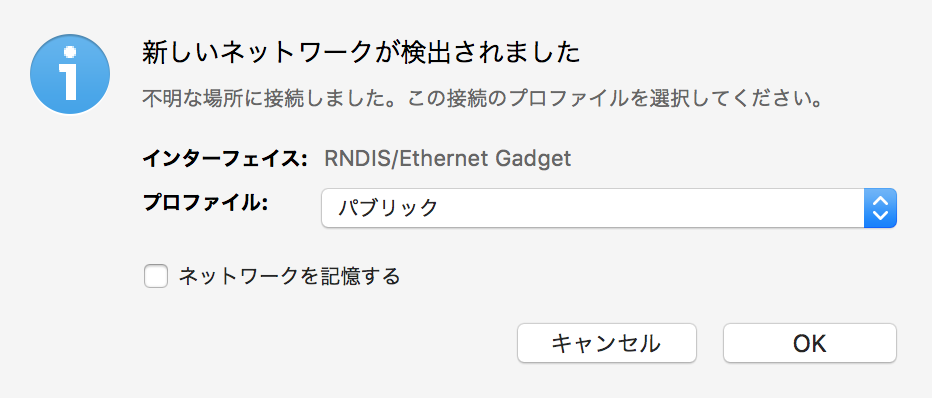
Rasbianの起動が完了しネットワーク接続されると、
「RNDIS/Etehrnet Gadget」というインターフェイスが検出され、
169.254.0.0/16のネットワクークが設定されます。


hyfr:~ hyperfree$ ifconfig
.
.
.
en6: flags=8863<UP,BROADCAST,SMART,RUNNING,SIMPLEX,MULTICAST> mtu 1500
options=4<VLAN_MTU>
ether ba:38:96:xx:xx:xx
inet6 fe80::1c61:994a:18f6:23a4%en6 prefixlen 64 secured scopeid 0xb
inet 169.254.79.186 netmask 0xffff0000 broadcast 169.254.255.255
nd6 options=201<PERFORMNUD,DAD>
media: autoselect (100baseTX <full-duplex>)
status: active
.
.
.
PCからRaspberry Pi zeroへsshでアクセス
sshでアクセスする際には、ユーザ名pi・ホスト名raspberrypi@localを使用します。
※bonjourサービスにより自動的に名前解決されます。windowsなどでインストールされていない場合は、ituneなどとともにインストールします。
hyfr:~ hyperfree$ ssh pi@raspberrypi.local
The authenticity of host 'raspberrypi.local (fe80::eec1:cf0e:301e:bdba%en6)' can't be established.
ECDSA key fingerprint is SHA256:QKqEYDlxZ7NQpaA4o7wlYRRiTJp7BW7TXe0X/2sxJkw.
Are you sure you want to continue connecting (yes/no)? yes
Warning: Permanently added 'raspberrypi.local,fe80::eec1:cf0e:301e:bdba%en6' (ECDSA) to the list of known hosts.
pi@raspberrypi.local's password:
Linux raspberrypi 4.9.59+ #1047 Sun Oct 29 11:47:10 GMT 2017 armv6l
The programs included with the Debian GNU/Linux system are free software;
the exact distribution terms for each program are described in the
individual files in /usr/share/doc/*/copyright.
Debian GNU/Linux comes with ABSOLUTELY NO WARRANTY, to the extent
permitted by applicable law.
Last login: Wed Nov 29 02:56:46 2017
SSH is enabled and the default password for the 'pi' user has not been changed.
This is a security risk - please login as the 'pi' user and type 'passwd' to set a new password.
pi@raspberrypi:~ $
hyfr:~ hyperfree$ ping raspberrypi.local
PING raspberrypi.local (169.254.133.230): 56 data bytes
Request timeout for icmp_seq 0
64 bytes from 169.254.133.230: icmp_seq=1 ttl=64 time=0.422 ms
64 bytes from 169.254.133.230: icmp_seq=2 ttl=64 time=0.410 ms
64 bytes from 169.254.133.230: icmp_seq=3 ttl=64 time=0.394 ms
64 bytes from 169.254.133.230: icmp_seq=4 ttl=64 time=0.407 ms
64 bytes from 169.254.133.230: icmp_seq=5 ttl=64 time=0.398 ms
^C
--- raspberrypi.local ping statistics ---
6 packets transmitted, 5 packets received, 16.7% packet loss
round-trip min/avg/max/stddev = 0.394/0.406/0.422/0.010 ms
pi@raspberrypi:~ $ ifconfig
lo: flags=73<UP,LOOPBACK,RUNNING> mtu 65536
inet 127.0.0.1 netmask 255.0.0.0
inet6 ::1 prefixlen 128 scopeid 0x10<host>
loop txqueuelen 1 (Local Loopback)
RX packets 31 bytes 2962 (2.8 KiB)
RX errors 0 dropped 0 overruns 0 frame 0
TX packets 31 bytes 2962 (2.8 KiB)
TX errors 0 dropped 0 overruns 0 carrier 0 collisions 0
usb0: flags=4163<UP,BROADCAST,RUNNING,MULTICAST> mtu 1500
inet 169.254.133.230 netmask 255.255.0.0 broadcast 169.254.255.255
inet6 fe80::f774:fd08:c3a7:e46f prefixlen 64 scopeid 0x20<link>
ether 56:34:95:xx:xx:xx txqueuelen 1000 (Ethernet)
RX packets 187 bytes 24613 (24.0 KiB)
RX errors 0 dropped 0 overruns 0 frame 0
TX packets 180 bytes 21719 (21.2 KiB)
TX errors 0 dropped 0 overruns 0 carrier 0 collisions 0
これで、HDMI・モニターやUSBマウス・キーボード がないシンプルな状態でRaspberry Pi zeroを使うことが出来ます!!
※追加設定しないとインターネットには出れないので注意。
参考URL
Programming your Pi Zero over USB - Raspberry Pi